How to install a ultraviolet (UV) cured tempered glass screen protector onto your phone
A liquid adhered screen protector might, at first, seem ominous to install. But rest assured, by following this guide you will be able to perfectly adhere the tempered glass to your smartphones display.
What is a UV Screen protector?
A UV screen protector, or sometimes called a liquid glue screen protector, is a type of screen protector that is adhered to you screen with a liquid (LOCA gel) and is cured with a ultraviolet light.
There are a few things of note before we start the installation:
Why use a UV screen protector?
Under which circumstances should you use a UV screen protector?
A UV screen protector is most often used when the display of a device is curved, and/or when the device makes use of an ultrasonic fingerprint sensor.
The glass is molded around the actual contours of the device, and the liquid glue completely fills the gaps between the phones display and the screen protector. This application process forces out any air bubbles.
Your ultrasonic fingerprint sensor will remain fully functional after the application. The thinness of the glass, combined with the unique composition of the UV glue, allows you to keep that feature of your phone fully operational. Additionally, your fingerprint sensor will feel snappy, and not prone to a high failure rate (99% of unlocks will be successful after re-adding a fingerprint).
What should I do if I make a mistake during the application process?
There are two scenarios in which you could make a mistake:
Before curing the UV glue: In such a case, wipe away the liquid adhesive with an absorbent material (e.g. paper towel), clean the underside of the glass with isopropyl alcohol, and reattempt the installation with a second vile of UV glue.
After curing the UV glue: You can still very carefully peel the glass off of your phone, clean both the screen protector and the phone with isopropyl alcohol, and reattempt the installation with a second vile of UV glue.
Does the screen protector naturally peel off?
The glass will not peel off over time if the proper installation procedures are followed.
The glass may, however, peel off if you use a case that makes physical contact with the screen protector.
I am unsure if water can weaken the glue enough to cause the screen protector to peel off.
When should I replace the screen protector?
All screen protectors naturally wear out over time as they are used. A screen protector is considered worn out when the oleophobic wears off. Once you notice far more fingerprints than usual on the glass, it’s time to replace it.
Secondly, if your screen protector is cracked, its time for a replacement.
How do I remove the screen protector?
It can be removed just like any other screen protector. However, is does require more force to remove it. The addition in efforts, combined with the thinness of the glass, usually causes the screen protector to crack.
How to apply a UV screen protector:
Step 1
Please ensure that you are sent the correct piece of glass. Lay the glass onto your phone, and see if it would fit. If something, or anything, looks even slightly off, please do not hesitate to contact us. Although unlikely, it may happen that we send you the wrong sheet of glass.
Step 2
Proceed with the installation in a sunlight-free room. There may not be any natural light present whatsoever. Close your blinds and switch on an artificial light. Natural sunlight contains UV rays which will start curing the UV glue.
Step 3
Work on a flat surface. You will be applying a liquid, similar in viscosity to water, onto your phones display. An oblique surface will cause the glue to run off of your phone, and it will make a huge mess. Do the application on a horizontal surface.
Step 4
If you have a screen protector on your phone, now is the time to remove it.
If your phone has a case on it, remove it.
Step 5
Use the first wet alcohol wipe to clean the metal frame of your phone. This is done to allow the barrier stickers to thoroughly adhere to the sides of your device. Avoid touching the sides of your phone until completion of the next step.
Step 6
Apply the stickers marked as “Speaker Sticker”, “Masking Tape”, and “Guide Sticker” (there are 6 in total) to bottom, and/or left, and/or right. Every hole on the bottom, left, and right should be completely covered. These include the charging port, speaker grid, volume buttons, power button, sim slot, headphone port, and microphone port. This is done to prevent glue seepage in the case of overflowing glue.
Step 7
This step is very important. Use the green piece of vinyl sticker to cover the front earpiece speaker of your phone.
Use scissors to cut the sticker into the correct shape. When applied, it should only cover the earpiece in the front, and all ports present at the top frame of the phone. To ensure that it has been applied correctly, do a dry fit of the glass. Temporarily lay the glass onto the phone to ensure the green vinyl sticker does not make any contact with the glass (do not sperate the screen protector from the plastic backing yet).
Step 8
Use the second wet alcohol wipe to clean the screen of your phone.
Step 9
Use the microfibercloth to clean and dry the screen of your phone. Avoid touching your screen from now on until directed to touch it again.
Step 10
This guide will now split into three types of installation trays. Follow the images that correspond to the type of installation tray you have.
Prepare the installation tray
T-Max
pull tab
Clear installation tray
absorption pads
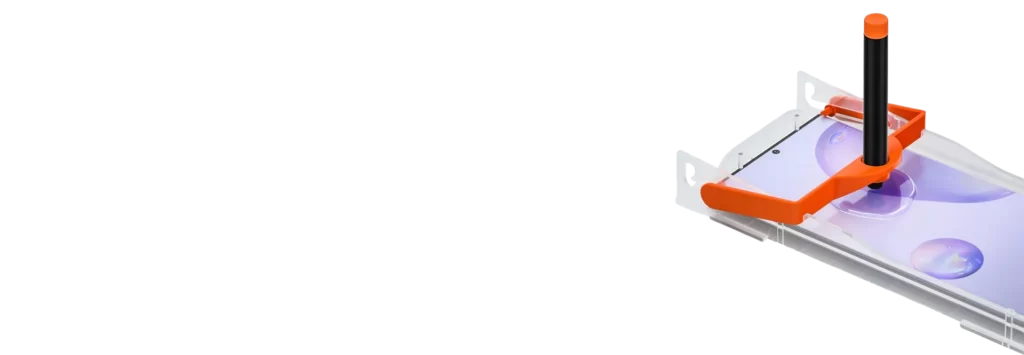
adjustable installation tray
absorption pads
Step 11
Insert your phone into the installation tray.
T-Max
Insert your phone from the bottom and firmly push upwards. The phone will be held in by friction and should be flush to the top lip. The entire phone will be lifted off its surface.
Clear installation tray
Insert your phone from the top. It will be held in place by gravity and the pressure from the foam absorption pads.
adjustable installation tray
Pull the sides of the installation tray apart and insert your phone from the top. It will be held snuggly in place by the springs in the installation tray.
Step 12
Use the dust removal sticker to remove any dust present on the screen.
Step 13
Empty the vile of UV glue onto the screen.
Twist off the orange cap from the glue vile and point that part onto the screen (only leave about a millimeter between the tip of the vile and the glass). Glue won’t be released from the vile yet. Align the vile to the correct spot on the glass, and twist off the black cap. Glue will now flow out. Empty the entire vile onto the display. It will collect into one large glob.
There should not be any bubbles in the glue, however, if there are any, use the clear plastic card marked as “repair card” to remove any bubbles by poking them.
Similarly, if the glue is not in one large glob, use the repair card to pull the globs together into one, large glob.
The repair card can also be used to pull the glue blob to the correct position on the display.
T-Max
insert position here
Clear installation tray
Insert position here
adjustable installation tray
Insert position here
Step 14
Position the pull tab onto the installation frame.
T-Max
fold over the orange pull tab
Clear installation tray
Slide triangle pull tab into the installation frame
adjustable installation tray
Slide triangle pull tab into the installation frame
Step 15
Lay the glass onto the installation frame
T-Max
Place the glass at the bottom and position the top corners onto the pull tabs
Clear installation tray
Place the glass at the bottom of the installation tray and position the top of the glass onto the angled pull tab.
adjustable installation tray
Place the glass at the bottom of the installation tray and position the top of the glass onto the angled pull tab.
Step 16
Slowly pull out the pull tab.
Step 17
When the glue makes contact with the screen protector, pull the pull tab away entirely at about 3x speed. The glass will now fully lay on your phones screen, with a layer of glue between the screen protector and the display.
Step 18
Wait until the glue has spread to every corner of the screen protector. This process can last anywhere from a few seconds to a minute. It shouldn’t last much longer than a minute.
Step 19
If at this point you notice that the screen protector is not vertically centered correctly, you can use a finger to gently move the glass up or down. Only apply sideway pressure. Do not push downward onto the glass! This will force glue to seep out. And that’s bad!
Step 20
Its finally time for the curing process!
If you have an ultrasonic fingerprint sensor on your phone, follow this step.
If you do not have an ultrasonic fingerprint sensor, skip this step.
Position the UV lamp over your phone and press the ‘on’ button. Move the light up and down to cure the UV glue a small amount. Start a mental countdown of 10 seconds. Try to not cure the glue for more than 10 seconds. Then move the UV light away from the phone.
Use the microfiber cloth and wrap your index fingertip with it. Using a circular motion, press onto the screen above the fingerprint area. This will bring the glass closer to the fingerprint sensor and allow for a better recognizing fingerprint sensor. While pressing onto the fingerprint sensor area with a circular motion, bring the UV lamp (turned on) to the fingerprint area and start curing the glue again. Do this for about 30 seconds.
Step 21
Mentally divide your phone into 3 equal sections. Top, middle, and bottom. Starting from the top, position the UV lamp over the phone and turn the UV light on by pressing the button. The lamp will stay turned on for 45 seconds. After the light turns off, repeat the same process for the middle and bottom sections.
Step 22
Very carefully remove your phone from the installation tray.
Step 23
Wipe off the sides of the screen protector with the microfiber cloth. This will remove any residual glue from the edges of the screen protector.
Step 24
Once again, position the UV lamp over the top of the phone and turn the UV light on by pressing the button. Wait a further 45 seconds or until the light turns off. Repeat the same process for the middle and bottom sections.
Step 25
Finally, re-register your fingerprint. Navigate to Settings > Biometrics and security > fingerprints and re-register your fingerprint.
And Congratulations! You have successfully installed a UV screen protector!